Thursday, August 30, 2012

Domino's-Style (VEGAN) Alfredo Pasta Bowl


Before I went vegan, I was a vegetarian for four years. One of my favorite things to get from Domino's was their alfredo pasta bowl with tomatoes. I loved loved LOVED it. Now, everyone knows that it's not vegan friendly..but guess what? It's not vegetarian friendly either. If you read the ingredients on their website, there is chicken fat in the sauce. Chicken fat! I never would have guessed that in a million years. 

But anyways, I missed having a pasta bowl like that. I was craving the cheesy flavor for weeks, so I thought why not try to make a vegan version of it..and I have to say, it turned out pretty good! The only thing I would do differently next time is use regular pasta instead of whole wheat. It'd taste more like the real thing, but this was really close from what I can remember. Obviously I didn't have 'the real thing' for quite awhile, but this definitely satisfied my craving!

Ingredients:
1 box of pasta
1 can of diced tomatoes (drained)
1/2 cup Tofutti cream cheese
1 cup non-dairy milk
1 large clove of garlic (or 1/2 - 1 tsp. of garlic powder)
1/2 tsp. of salt
1/2 tsp. pepper
3 tbsp. dried parsley
Tofutti mozzarella cheese slices

I made the sauce by using a blender. Put the cream cheese, milk, garlic, salt, pepper and parsley all in the blender. Mix it well so that there are no lumps.

While I had my pasta cooking, I put the sauce in a separate pot to heat it up. You only need to do that for about 10-15 minutes on medium heat.

Once the pasta is cooked and drained, simply pour the sauce over the pasta.

Next, toss in 3 or 4 slices of the mozzarella cheese. This really added to the flavor!

Then add in the can of tomatoes.

Return everything to medium heat for about 5 or 10 minutes..Just until everything is warm and the cheese is melted.


Tuesday, July 17, 2012

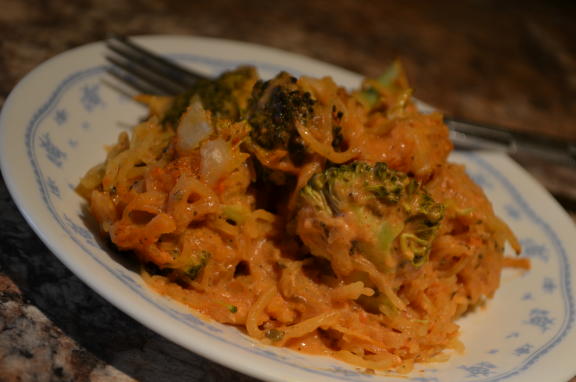
Spaghetti Squash and Broccoli Casserole


I like experimenting with spaghetti squash. I've made it a few different ways before and I have to say that this is definitely my favorite way as of yet! I found this recipe from a blog called Peas and Thank You, so check that site out too!


It has a lot of flavor and the melted/broiled cheese mixed in with the broccoli just adds to it!

Ingredients:
   1 large spaghetti squash
   2 cups of marinara sauce
   2 tsp. dried oregano
   2 tsp. dried basil
   1/2 cup non-dairy cream cheese (I used Tofutti's Better Than Cream Cheese)
   1/4  cup nutritional yeast
   2 cups of broccoli
   1/2 cup of non-dairy mozzarella cheese (I used Tofutti for this too. Three slices broken up into little pieces.)
 
First thing you want to do is cook your spaghetti squash. This is the most difficult part because - let's be honest, spaghetti squash is a pain to cut in half! My upper body gets such an unnecessary workout every time I make it! So yes, cut it in half (carefully!) and then scoop out all the seeds and 'guts' from the squash.

Fill a microwave safe dish (that has a lid) with about a half an inch of water and place one half of the squash face down. Cover and microwave for about 10 minutes. Do the same with the other half, and then scrape the insides of the squash into a bowl and set it aside.

Meanwhile, preheat your oven to 350 degrees.

In a large saucepan combine your marinara sauce, dry ingredients and the cream cheese. Heat over low heat until the cream cheese is melted and it starts to form a creamy sauce. Add salt and pepper to taste.

Next, add the spaghetti squash and broccoli in with your sauce and stir it up so that everything is distributed evenly.

Transfer your mixture into a casserole dish that has been lightly spritzed with cooking oil and then add your cheese on top.

Place it in the oven for 20-25 minutes or until the cheese is melted. You can also do what I did, and turn the broiler on for a little bit so your cheese gets nice and bubbly!


  Look at how creamy it turned out! So so good!

Monday, July 2, 2012

Product Review: Leahey Gardens Vegan Macaroni and Cheese


When I went vegan, macaroni and cheese was something that I started to miss pretty quickly. I tried a few different brands and products that claimed to taste just like real macaroni and cheese but none of them lived up to the expectations that I had for them. This one, however, is probably the closest you're going to get to real mac and cheese. My mom whipped up a homemade concoction awhile ago and that tastes even better (I love things homemade, I always think it tastes much better!) BUT for a quick supper, this does the trick. You just boil water, cook the noodles and drain - just like a regular box of mac n' cheese. Then you get the cheese mixture, mix it with one cup of water or milk (I used almond milk) and bring it to a boil then let it simmer and thicken up. Then add it to your drained macaroni. Oh it's so so good. I chopped up some broccoli and tossed it in with the cheese for a bit because I've always loved the broccoli/cheese combination.


It tastes so good and is so creamy - I actually prefer this taste over say, Kraft. That's what I used to eat before going vegan. This is so much healthier too.


Seriously, don't you wish you could just take a scoop right this minute and try it out?

Tuesday, June 5, 2012

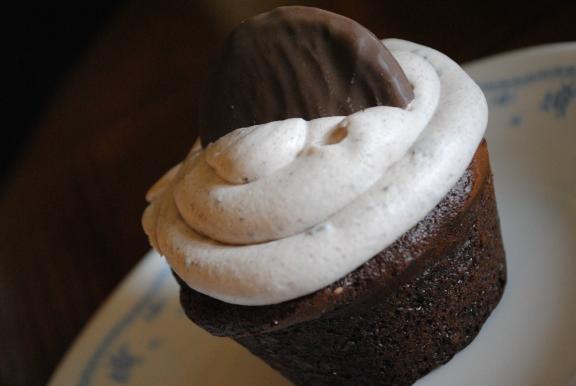
Vegan Oreo Cupcakes


This recipe is just a quick and easy way to make a cake or in this case, cupcakes out of a box mix. I usually always make things completely homemade, but since I went vegan I pretty much have had to learn new ways to make everything. These were actually the first cupcakes I made since going vegan that turned out just how I wanted them to. The taste, the texture..everything! You wouldn't even know they were vegan. My fiance ate two of them the day I made them - and he is always super hesitant and weary to try things when I tell him something is vegan, so him eating TWO says a lot right there!

Okay enough rambling, here is the recipe.

Ingredients:
   1 Box of Duncan Hines Dark Chocolate cake mix
   1/2 cup white flour
   3 tbs. apple sauce
   2 tsp. baking powder
   1 1/2 cups milk substitute (I used chocolate soy milk to make it even more chocolately)
   Oreo Ultimate Icing
   Mint Fudge Oreos (optional)
 

Mix all of your ingredients together. When I made these, I just lightly sprayed my cupcake tray with Smart Balance cooking spray and then poured the mixture into the tray. No cupcake papers this time. Follow the instructions on the back of the cake mix box for the time/temperature to cook them at. For me it took about 25 minutes at 325 degrees.

Again, I took the easy way and used this frosting I found at our local grocery store. Oreo Ultimate Icing. (Can you tell I was craving Oreos badly that day?) I forgot to take a picture, so I had to find one online. Then I just topped it with a Mint Fudge Oreo for decoration.


They were delicious!

Thursday, April 26, 2012

Product Review: PB2: Powdered Peanut Butter


I really like peanut butter, but I always hated how many calories just two tablespoons have (usually 200 or close to it!). So when I heard of this stuff, I thought I would give it a try. This has only 45 calories and 13 calories from fat per serving. The only ingredients are roasted peanuts, sugar and salt. So it's definitely a much better choice health-wise!

It's super easy to whip up. All you do is take two tablespoons of the PB2 powder and one tablespoon of water, and it will look something like this.


This was the chocolate one, but they also have plain peanut better. Personally I think the chocolate one tastes better. I like the little hint of sweetness it has compared to the original peanut butter.


This was my breakfast this morning. A caramel rice cake with an apple and some PB2. I started out spreading it on the apples but then just dipped it because it was just as easy to do it that way..but I do think it looks better ON the apples for a picture!

Monday, April 23, 2012

Product Review: Gardein Beefless Sliders


I've recently tried these beefless sliders by Gardein and I have to say - they're probably the best meatless hamburger I've tried so far! Back in my meat eating days, I actually never had a slider so it caught my attention when I saw a vegan version available!

They're very simple to make too. There are directions for the microwave on the box but I like to make them on the stove. I think they just taste better that way. All you have to do is add a little oil to a pan, heat it up (I usually just keep mine on medium heat) and then cook them for about 4-5 minutes on each side. I also toast the buns in a separate pan while the burgers are cooking.


I usually fix a salad to go with it. It's perfect for a quick lunch or dinner at home.


Oh, and these are good plain but I like to add a slice of Tofutti mozzarella cheese on mine to give it a little something extra!


Thursday, April 12, 2012

'Meat' and Vegetable Lasagna


Ingredients:
   1 box of lasagna noodles
   3 vegan hamburger patties (I used Boca)
   1 26 oz. jar of pasta sauce
   1 large onion
   1 cup of spinach
   Vegan mozzarella cheese (I used Toffuti)


First boil and cook your lasagna noodles according to the instructions on the box.

While you wait for your noodles to get done, heat up your hamburger patties. Then cut them up into tiny pieces. I would recommend using Boca meatless crumbles, but my local grocery store didn't have any that day so I just used the patties. They worked just as well!
   
Next, saute your onions to get them nice and soft. Chop up the spinach as well.

Once your noodles are done and you have all your ingredients together, preheat your oven to 350 degrees.

Prepare a baking dish to lay the rolled noodles in. Start by putting a layer of pasta sauce on the bottom of the dish to prevent the noodles from sticking.

Next, take a noodle and lay it on a glass plate. Scoop some of your pasta sauce onto the noodle and spread it around so you have a nice thin layer. Then add on your ingredients! Layer the hamburger, onion, spinach and since I used the cheese slices - I just broke 'em up into smaller pieces and tossed them here and there on top of the ingredients.

Then for the part that can get messy..Very carefully roll up the noodle and set it in your baking dish with the end of the noodle facing down to keep it from falling apart. Do this until your dish is full (I got 6 to fit nicely into a smaller baking dish).

Once you have all the noodles rolled up, top it with the remaining sauce (or just add as much as you like). Then get another two slices of cheese to break apart and lay on top of everything.

Pop it in the oven for about 45 minutes and enjoy it!