Thursday, October 3, 2013

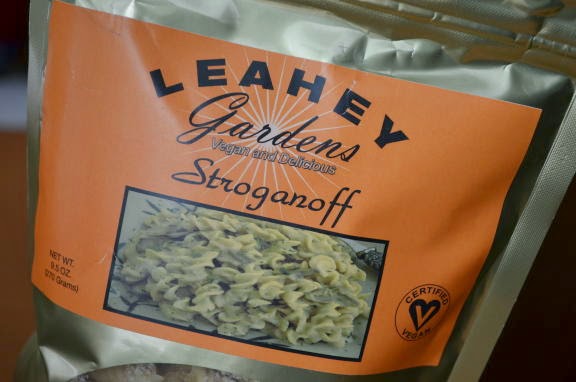
Product Review: Leahey Gardens No Beef Stroganoff

So after a couple months, I am yet again - back! I'm really hoping to keep up with my blog but like I said when I first started this, I do have some health problems (I have a condition called Dysautonomia) which kind of prevents me from cooking, what I think, is blog-worthy food on a regular basis. I'm thinking of making my next post (probably next week) just talking about what exactly Dysautonomia is. So if anyone happens to come across my blog and sees a post here, and then another post a month or two later - you'll have more of an understanding as to why that is.

But for THIS week, I am doing a product review! On Leahey Gardens No Beef Stroganoff. I first tried this over a year ago and loved it right away. It kind of reminds me of Hamburger Helper, now that I think of it.


It's very simple to make. You just add the pouch to 5 cups of water. Stir and bring it to a boil. Then you basically let it simmer and thicken, stirring occasionally and that's it! One pouch makes five servings. So I will usually measure it out in separate bowls right away. That way I can just grab a bowl and pop it in the microwave for quick future suppers.


It's very thick and creamy..and it has a great beef flavor to it. I'd definitely recommend giving it a try!

Thursday, June 13, 2013

Raspberry Lemonade Smoothie

This smoothie is very simple to make and for the hot summer days, very refreshing to have! I found this idea on Pinterest, linked to http://www.delightfully-tacky.com/.  I love strawberry and lemonade together, so when I saw this - I thought I would give the lemonade/raspberry combination a try. It's a little more bitter tasting, but I still really liked it.

Ingredients:
1 can of lemonade concentrate
1 and 1/2 cups frozen raspberries
1 tray of ice
1 can of water

Just mix all of your ingredients together in a blender. This picture isn't that great, the frozen raspberries mixed with the warm kitchen air and made it a little foggy - but it was the best I could do!


Then pour it into a glass and drink up!


I obviously couldn't drink the entire batch I made, so I ended up freezing a decent amount of it. It's perfect to have a little bowl of this to help you cool of in the hot weather! It's almost like some type of sorbet, I would say.


Monday, May 13, 2013

Tinkyada Brown Rice Pasta with Veggies


My family and I go to a local produce store quite regularly. We made a trip there over the weekend and stocked up on lots of veggies. Whenever we have a ton lying around I always think, what can I make with that? Instead of just eating it plain as a side dish or something.. Sometimes I won't know exactly WHAT to do, so I just mix some things together and hope it turns out good. That's what I did today with this, and it was delicious. I'll definitely be making it again. I made a small portion (it made three servings - I had this for lunch and my dad and I split the rest for dinner tonight). Like with some other recipes I posted, this is another one where you can just add however much you like of something. There are no 'exact' amounts..but I will list what I used for my 3 servings!

Ingredients:
2 stalks of asparagus
1/2 medium sized onion diced
1 medium tomato diced
1/2 large cucumber
Tinkyada brown rice spaghetti
garlic salt (to taste)
Vegetarian Express Parmesan sprinkles (to taste)

All you do is steam your veggies (add in some garlic and parmesan as it's cooking), while you make your spaghetti and then mix the two together. I don't know exactly how much pasta I used. I just estimated what would be enough for the amount of vegetables I was using. I love pasta, but when I'm eating it with vegetables, I try not to add TOO much just because I don't want the meal to become too heavy. You can use any kind of spaghetti you like, I just used the Tinkyada because it was what we had and it's wheat free/gluten free. I'm not completely gluten free, but when I can avoid it, I try to!

I really like this vegan Parmesan cheese I found. All it is is blanched almond meal, sea salt, nutritional yeast, dehydrated onion and citric acid. It doesn't taste exactly like Parmesan by itself, but it's probably the closest you're going to get to the real thing and when you add it onto something (like spaghetti, or pizza) you really can't tell the difference.


It's a very basic recipe and super quick and easy to make, I'd definitely recommend giving it a try!


Thursday, February 28, 2013

Garlic Soup


My fiance, Greg, told me about this garlic soup after he tried it while he was in the Czech Republic. It's also called Česnečka, which I learned after a quick Google search! I didn't know what to imagine when he described it to me. I just pictured a very strong..garlic flavored soup. Even while I was cooking it, I was a bit worried that it would turn out horrible because the entire kitchen smelled of garlic. Nothing else, not a hint of any other flavor. Just garlic! I thought there is no way this will turn out tasting good. But I was wrong! Once it's finished cooking and you add in the toasted bread, it has a tasty butter flavor to it that mixes really well with the broth. Greg said it didn't taste quite the same as what he had, but he liked it and I really liked it too. In fact, just sitting here thinking about it makes me want to whip up another pot of it! Below is the recipe Greg gave me to go by, tweaked to make it vegan.

Ingredients:
8 cups broth (beef or chicken) I used G. Washington 'beef' broth.
6 cloves of garlic (more or less, according to your personal taste)
1 tsp. salt (more or less according to your person taste)
1 tsp. marjoram
1 tsp. freshly ground black pepper
2 tbsp. vegan butter substitute (I used Blue Bonnet, Earth Balance is also good too)
2 medium potatoes, peeled and dices into bite-sized pieces
1 tsp. caraway seeds
2 tbsp. parsley
slices of bread

Mash the garlic together with the salt.

Place the garlic and salt mixture into a large pot, add broth and slowly bring to a boil. Reduce heat and let simmer. Add caraway seeds, potatoes, marjoram, and butter. Simmer uncovered till potatoes are tender. Add in the pepper.

Fry slices of bread in butter (you're basically making croutons). Place a slice of bread in each bowl and ladle the garlic soup over the bread. Sprinkle with parsley.


With this bowl, I went a little crazy with the pieces of toasted bread. I probably used a slice and a half, which you might think is too much for a small bowl of soup like I had..but I think the bread is what makes the whole thing. But like with the garlic, salt and pepper - you can just adjust the recipe to your liking.

Thursday, January 24, 2013

Macaroni Salad


My mom made this today and I thought I would make a blog post about it because it's really simple to make and it's so good! To me, it tastes just like the real thing. For this recipe, she used Nayonaise. We've tried both Nayonaise and Veganaise before. I think Veganaise is a *little* bit better, probably the closest to mayonnaise you're going to get...Nayonaise has a stronger vinegar taste to it. That's the only difference that I've noticed. I like vinegar though, so either one will work for me!

Ingredients:
1/2 lb. elbow macaroni
2 cups of Nayonaise/Veganaise
1 large onion
2 stalks of celery
1 tsp. basil
2 tsp. parsley
1/2 tsp. salt
1/4 tsp. pepper

Just cook the macaroni according to the directions on the box, drain them and then add in all the other ingredients listed above. Obviously you can add more or less of certain ingredients depending on your taste. Like for ours, my mom probably added a little over 2 cups of Nayonaise because we think it tastes better when it's more creamy..We also like a lot of onion, so we put tons of onion in...It all depends on what you like.

Thursday, January 17, 2013

Product Review: Amy's Tofu Scramble


Before I went vegan I would have scrambled eggs quite often for breakfast (probably TOO often, from a health perspective..) so when I first tried this, I was hoping it would satisfy my cravings for that. Thankfully, it did! I love this but I try not to eat it too often because it is frozen, and I try to stay away from frozen foods as much as I can..but when I'm not feeling well, or just want something quick - this is great to just pop in the microwave for four minutes and it's done.

The tofu scramble itself is delicious. I'd like to learn how to make it myself. It would be a lot cheaper and I would have it more often. But, this scramble is made up of tofu (obviously) and tons of veggies. It has spinach, onions, zucchini, mushrooms, carrots and tomato. There is also a side of hash browns.


It's vegan, gluten free and all organic. I would definitely recommend giving it a try!

Wednesday, January 2, 2013

Bite-Sized Taco Appetizers


I came up with this little idea after my family's get together on New Year's Eve. Now, I know it's been done before - but probably not quite as often vegan style! So I thought I would make a post about it. They're a great little snack to serve and they're healthy too. Very low calorie!

Ingredients:
Tostitos Scoops
Lightlife 'meatless' ground beef (1 package equals close to 1 pound of beef)
Old El Paso taco seasoning packet
Dayia jack style cheese (shredded)
mild salsa

All you have to really do is cook the ground beef according to the package, including the seasoning packet and you're done with the 'hardest' part of this recipe.

The rest is simply putting your little mini tacos together. Scoop the meat and salsa into the Scoop and sprinkle some vegan cheese on top. You could add in onions or peppers if you'd like - I thought of doing that myself..but I figured since there's already onions and tomatoes in the salsa I used, it didn't really need any extra. But there you have it..So simple and so tasty. A great appetizer to serve at your next party!


Stay tuned for more (hopefully) more frequent updates! One of my resolutions this year is to make this blog even better - and share as many recipes as I can think of with everyone. My goal is to make at least one post a week. Of course, that depends on my health - and if I'm feeling good enough to actually do some cooking that week. But I am definitely going to try my hardest to make that happen! 

Thursday, November 15, 2012

Garlic and Breadcrumb Pasta


I saw this recipe floating around Pinterest for quite awhile and finally decided to give it a try. It always sounded really good to me - and it ended up tasting really good as well, so I don't know why I waited so long to make it.

Ingredients:
8 ounces of pasta (I used angel hair pasta just cause that's my personal favorite)
6 cloves of garlic (chopped fine)
2 tbs. olive oil
1/2 cup of breadcrumbs
2 and 1/2 tbs. lemon juice
1/4 cup parsley (more/less depending on what you like)

First, cook your pasta as directed on the box.

Next, heat up your oil in a medium size pan. Add your garlic. Cook it for about 5 minutes - just make sure it doesn't burn.

Add your breadcrumbs in with the garlic. Make sure to stir it frequently. You only want to keep it on the heat until it turns a light golden brown color.

Once your pasta is done, you can put it back in the pot or in a bowl to add in the rest of your ingredients.

Toss in the garlic/breadcrumb mixture and then add the lemon juice and parsley. For mine, I used slightly less than 1/4 cup - I just thought the whole 1/4 cup was a little too much parsley! I also tossed in a little extra olive oil as I mixed everything together when I thought it was getting too dry.


Simple, quick and tasty!

Thursday, November 1, 2012

Banana Chocolate Chip Muffins

 
I was in a baking mood this week and I was tired of cupcakes and super sweet icing..I wanted something a little sweet but also a little healthier than cupcakes. So I decided on these banana chocolate chip muffins! I love 'em. They have been my breakfast for the past few days along with a cup of soymilk!
 
Ingredients:
3 ripe bananas mashed
2 1/3 cup flour (I use King Arthur gluten free flour)
3/4 tsp. baking soda
1/2 tsp. baking powder
1 tsp. cinnamon
1/2 tsp. vanilla
1/2 cup applesauce
3/4 cup sugar
1/2 cup soymilk
1/2 vegan chocolate chips (I like to use Ghirardelli semi-sweet chocolate chips)
 
Now for this, I used my BabyCake maker, but if you're baking the typical way - preheat your oven to 350 degrees.
 
In a medium sized bowl, combine the flour, baking soda, baking powder, and cinnamon.
 
In a large bowl, mix the mashed bananas, applesauce, vanilla, sugar, and almond milk together. 
 
Once you have everything mixed well, slowly beat the dry ingredients in with the wet. Fold in the chocolate chips. 
 
Bake for 25-30 minutes until they're golden brown. I always check mine with a toothpick. When it comes out clean, you know they're done!


Saturday, October 27, 2012

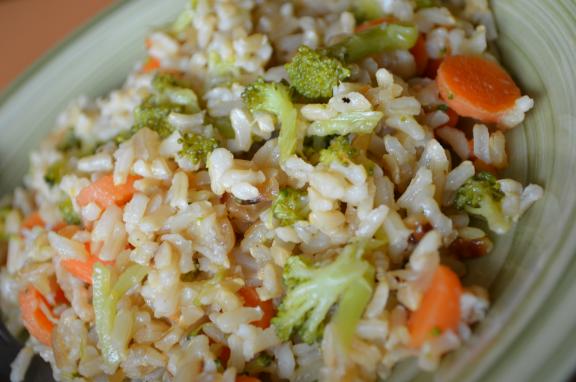
Rice & Veggie Mix - With Duck Sauce!


The title pretty much explains it all. I love brown rice, and I saw so many recipes online with different vegetables thrown in, and different dressings, or cheese mixes to use along with it..but none of them sounded that appealing to me when I was looking. So I decided to just make some rice, add in the vegetables I like the best (broccoli, carrots, and onions). Then I got the brilliant idea to add in duck sauce!

Whenever we got Chinese food in the past, it always came with a packet of duck sauce. That's the only time I had ever seen it or heard of it. Until recently! One of our local grocery stores started carrying jars of it so I had to get one to have on hand. I've used it with other things in the past, but it's always the best with rice in my opinion. It gives it a sweet yet tangy flavor that nothing else does. It's so, so good!

Ingredients
4 servings of brown rice
2 small heads of broccoli
1/2 a bag of baby carrots sliced
1 small onion
1/4 cup duck sauce

This whole process is so simple. Boil your rice. While that's cooking, steam (or saute) your veggies. Once they're done, simply mix them together and add in the duck sauce. Looking back, I probably could've added 1/2 a cup because I like the flavor so much..but this recipe is all about adding in however much you like of both the sauce and vegetables.


Monday, September 10, 2012

Fried Breaded Eggplant


You would think that it'd be easy to find breadcrumbs that are vegan friendly, right? Wrong! That's what I thought when I first got a craving for eggplant a few months ago. Looking through all the different brands of breadcrumbs they have at my local grocery store, almost every single one has milk and/or eggs in them! Which I think is unnecessary. My mom found one or two of the Shake n' Bake brand ones that are safe, but I had ordered a different brand online (Italian style) that I thought I would give a try tonight. 


It's Edward and Sons Italian Herbs Organic Breadcrumbs. Vegan and organic, perfect! But I was worried about how it would taste. The last time I tried making eggplant, I used panko and that did not work out at all. It was flavorless, and way too crunchy for coating eggplant. These worked out great though! I'll definitely be using them again.

The ingredients are simple for this one:
1 Eggplant
Breadcrumbs
Italian Dressing
Cooking spray/olive oil

First you want to slice the eggplant - you can keep the skin on if you want..I usually cut that off first and then slice it into thin circles. 

Next, pour some breadcrumbs into a bowl that will be large enough to dip your slices into. 

I used both Italian dressing and water to coat the eggplant before dipping it in the breadcrumbs. The dressing gives more of a sweet flavor to it, which I like. My mom likes it plain though, which it why I used water for hers. It's definitely healthier than using eggs, and you save some calories this way too. Once you do that, just dip it into your breadcrumbs. 

For frying it, you're going to need to spray your pan with cooking spray or put some olive oil in your pan.

Cook on medium heat until the eggplant is soft and until it's brown enough to your liking.


Mmm, so good!


Thursday, August 30, 2012

Domino's-Style (VEGAN) Alfredo Pasta Bowl


Before I went vegan, I was a vegetarian for four years. One of my favorite things to get from Domino's was their alfredo pasta bowl with tomatoes. I loved loved LOVED it. Now, everyone knows that it's not vegan friendly..but guess what? It's not vegetarian friendly either. If you read the ingredients on their website, there is chicken fat in the sauce. Chicken fat! I never would have guessed that in a million years. 

But anyways, I missed having a pasta bowl like that. I was craving the cheesy flavor for weeks, so I thought why not try to make a vegan version of it..and I have to say, it turned out pretty good! The only thing I would do differently next time is use regular pasta instead of whole wheat. It'd taste more like the real thing, but this was really close from what I can remember. Obviously I didn't have 'the real thing' for quite awhile, but this definitely satisfied my craving!

Ingredients:
1 box of pasta
1 can of diced tomatoes (drained)
1/2 cup Tofutti cream cheese
1 cup non-dairy milk
1 large clove of garlic (or 1/2 - 1 tsp. of garlic powder)
1/2 tsp. of salt
1/2 tsp. pepper
3 tbsp. dried parsley
Tofutti mozzarella cheese slices

I made the sauce by using a blender. Put the cream cheese, milk, garlic, salt, pepper and parsley all in the blender. Mix it well so that there are no lumps.

While I had my pasta cooking, I put the sauce in a separate pot to heat it up. You only need to do that for about 10-15 minutes on medium heat.

Once the pasta is cooked and drained, simply pour the sauce over the pasta.

Next, toss in 3 or 4 slices of the mozzarella cheese. This really added to the flavor!

Then add in the can of tomatoes.

Return everything to medium heat for about 5 or 10 minutes..Just until everything is warm and the cheese is melted.


Tuesday, July 17, 2012

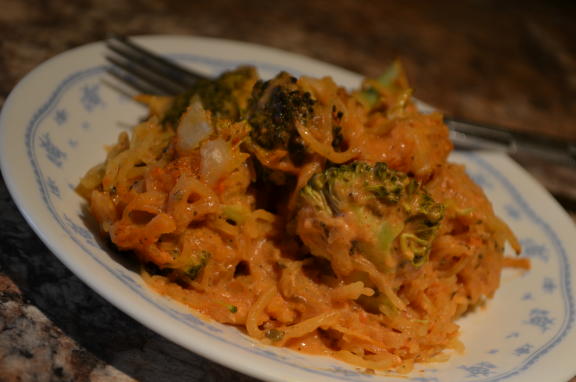
Spaghetti Squash and Broccoli Casserole


I like experimenting with spaghetti squash. I've made it a few different ways before and I have to say that this is definitely my favorite way as of yet! I found this recipe from a blog called Peas and Thank You, so check that site out too!


It has a lot of flavor and the melted/broiled cheese mixed in with the broccoli just adds to it!

Ingredients:
   1 large spaghetti squash
   2 cups of marinara sauce
   2 tsp. dried oregano
   2 tsp. dried basil
   1/2 cup non-dairy cream cheese (I used Tofutti's Better Than Cream Cheese)
   1/4  cup nutritional yeast
   2 cups of broccoli
   1/2 cup of non-dairy mozzarella cheese (I used Tofutti for this too. Three slices broken up into little pieces.)
 
First thing you want to do is cook your spaghetti squash. This is the most difficult part because - let's be honest, spaghetti squash is a pain to cut in half! My upper body gets such an unnecessary workout every time I make it! So yes, cut it in half (carefully!) and then scoop out all the seeds and 'guts' from the squash.

Fill a microwave safe dish (that has a lid) with about a half an inch of water and place one half of the squash face down. Cover and microwave for about 10 minutes. Do the same with the other half, and then scrape the insides of the squash into a bowl and set it aside.

Meanwhile, preheat your oven to 350 degrees.

In a large saucepan combine your marinara sauce, dry ingredients and the cream cheese. Heat over low heat until the cream cheese is melted and it starts to form a creamy sauce. Add salt and pepper to taste.

Next, add the spaghetti squash and broccoli in with your sauce and stir it up so that everything is distributed evenly.

Transfer your mixture into a casserole dish that has been lightly spritzed with cooking oil and then add your cheese on top.

Place it in the oven for 20-25 minutes or until the cheese is melted. You can also do what I did, and turn the broiler on for a little bit so your cheese gets nice and bubbly!


  Look at how creamy it turned out! So so good!

Monday, July 2, 2012

Product Review: Leahey Gardens Vegan Macaroni and Cheese


When I went vegan, macaroni and cheese was something that I started to miss pretty quickly. I tried a few different brands and products that claimed to taste just like real macaroni and cheese but none of them lived up to the expectations that I had for them. This one, however, is probably the closest you're going to get to real mac and cheese. My mom whipped up a homemade concoction awhile ago and that tastes even better (I love things homemade, I always think it tastes much better!) BUT for a quick supper, this does the trick. You just boil water, cook the noodles and drain - just like a regular box of mac n' cheese. Then you get the cheese mixture, mix it with one cup of water or milk (I used almond milk) and bring it to a boil then let it simmer and thicken up. Then add it to your drained macaroni. Oh it's so so good. I chopped up some broccoli and tossed it in with the cheese for a bit because I've always loved the broccoli/cheese combination.


It tastes so good and is so creamy - I actually prefer this taste over say, Kraft. That's what I used to eat before going vegan. This is so much healthier too.


Seriously, don't you wish you could just take a scoop right this minute and try it out?

Tuesday, June 5, 2012

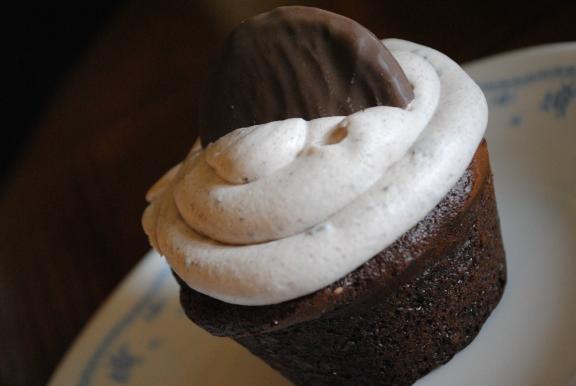
Vegan Oreo Cupcakes


This recipe is just a quick and easy way to make a cake or in this case, cupcakes out of a box mix. I usually always make things completely homemade, but since I went vegan I pretty much have had to learn new ways to make everything. These were actually the first cupcakes I made since going vegan that turned out just how I wanted them to. The taste, the texture..everything! You wouldn't even know they were vegan. My fiance ate two of them the day I made them - and he is always super hesitant and weary to try things when I tell him something is vegan, so him eating TWO says a lot right there!

Okay enough rambling, here is the recipe.

Ingredients:
   1 Box of Duncan Hines Dark Chocolate cake mix
   1/2 cup white flour
   3 tbs. apple sauce
   2 tsp. baking powder
   1 1/2 cups milk substitute (I used chocolate soy milk to make it even more chocolately)
   Oreo Ultimate Icing
   Mint Fudge Oreos (optional)
 

Mix all of your ingredients together. When I made these, I just lightly sprayed my cupcake tray with Smart Balance cooking spray and then poured the mixture into the tray. No cupcake papers this time. Follow the instructions on the back of the cake mix box for the time/temperature to cook them at. For me it took about 25 minutes at 325 degrees.

Again, I took the easy way and used this frosting I found at our local grocery store. Oreo Ultimate Icing. (Can you tell I was craving Oreos badly that day?) I forgot to take a picture, so I had to find one online. Then I just topped it with a Mint Fudge Oreo for decoration.


They were delicious!

Thursday, April 26, 2012

Product Review: PB2: Powdered Peanut Butter


I really like peanut butter, but I always hated how many calories just two tablespoons have (usually 200 or close to it!). So when I heard of this stuff, I thought I would give it a try. This has only 45 calories and 13 calories from fat per serving. The only ingredients are roasted peanuts, sugar and salt. So it's definitely a much better choice health-wise!

It's super easy to whip up. All you do is take two tablespoons of the PB2 powder and one tablespoon of water, and it will look something like this.


This was the chocolate one, but they also have plain peanut better. Personally I think the chocolate one tastes better. I like the little hint of sweetness it has compared to the original peanut butter.


This was my breakfast this morning. A caramel rice cake with an apple and some PB2. I started out spreading it on the apples but then just dipped it because it was just as easy to do it that way..but I do think it looks better ON the apples for a picture!

Monday, April 23, 2012

Product Review: Gardein Beefless Sliders


I've recently tried these beefless sliders by Gardein and I have to say - they're probably the best meatless hamburger I've tried so far! Back in my meat eating days, I actually never had a slider so it caught my attention when I saw a vegan version available!

They're very simple to make too. There are directions for the microwave on the box but I like to make them on the stove. I think they just taste better that way. All you have to do is add a little oil to a pan, heat it up (I usually just keep mine on medium heat) and then cook them for about 4-5 minutes on each side. I also toast the buns in a separate pan while the burgers are cooking.


I usually fix a salad to go with it. It's perfect for a quick lunch or dinner at home.


Oh, and these are good plain but I like to add a slice of Tofutti mozzarella cheese on mine to give it a little something extra!


Thursday, April 12, 2012

'Meat' and Vegetable Lasagna


Ingredients:
   1 box of lasagna noodles
   3 vegan hamburger patties (I used Boca)
   1 26 oz. jar of pasta sauce
   1 large onion
   1 cup of spinach
   Vegan mozzarella cheese (I used Toffuti)


First boil and cook your lasagna noodles according to the instructions on the box.

While you wait for your noodles to get done, heat up your hamburger patties. Then cut them up into tiny pieces. I would recommend using Boca meatless crumbles, but my local grocery store didn't have any that day so I just used the patties. They worked just as well!
   
Next, saute your onions to get them nice and soft. Chop up the spinach as well.

Once your noodles are done and you have all your ingredients together, preheat your oven to 350 degrees.

Prepare a baking dish to lay the rolled noodles in. Start by putting a layer of pasta sauce on the bottom of the dish to prevent the noodles from sticking.

Next, take a noodle and lay it on a glass plate. Scoop some of your pasta sauce onto the noodle and spread it around so you have a nice thin layer. Then add on your ingredients! Layer the hamburger, onion, spinach and since I used the cheese slices - I just broke 'em up into smaller pieces and tossed them here and there on top of the ingredients.

Then for the part that can get messy..Very carefully roll up the noodle and set it in your baking dish with the end of the noodle facing down to keep it from falling apart. Do this until your dish is full (I got 6 to fit nicely into a smaller baking dish).

Once you have all the noodles rolled up, top it with the remaining sauce (or just add as much as you like). Then get another two slices of cheese to break apart and lay on top of everything.

Pop it in the oven for about 45 minutes and enjoy it!